disclaimer: some content has been omitted from this project in order to protect the intellectual property of CHIRP TECHNOLOGIES INC.
what does chirp do?
The platform enables brokers to bridge the gap between aircraft operators and travellers, and helps them service the needs of their clients.

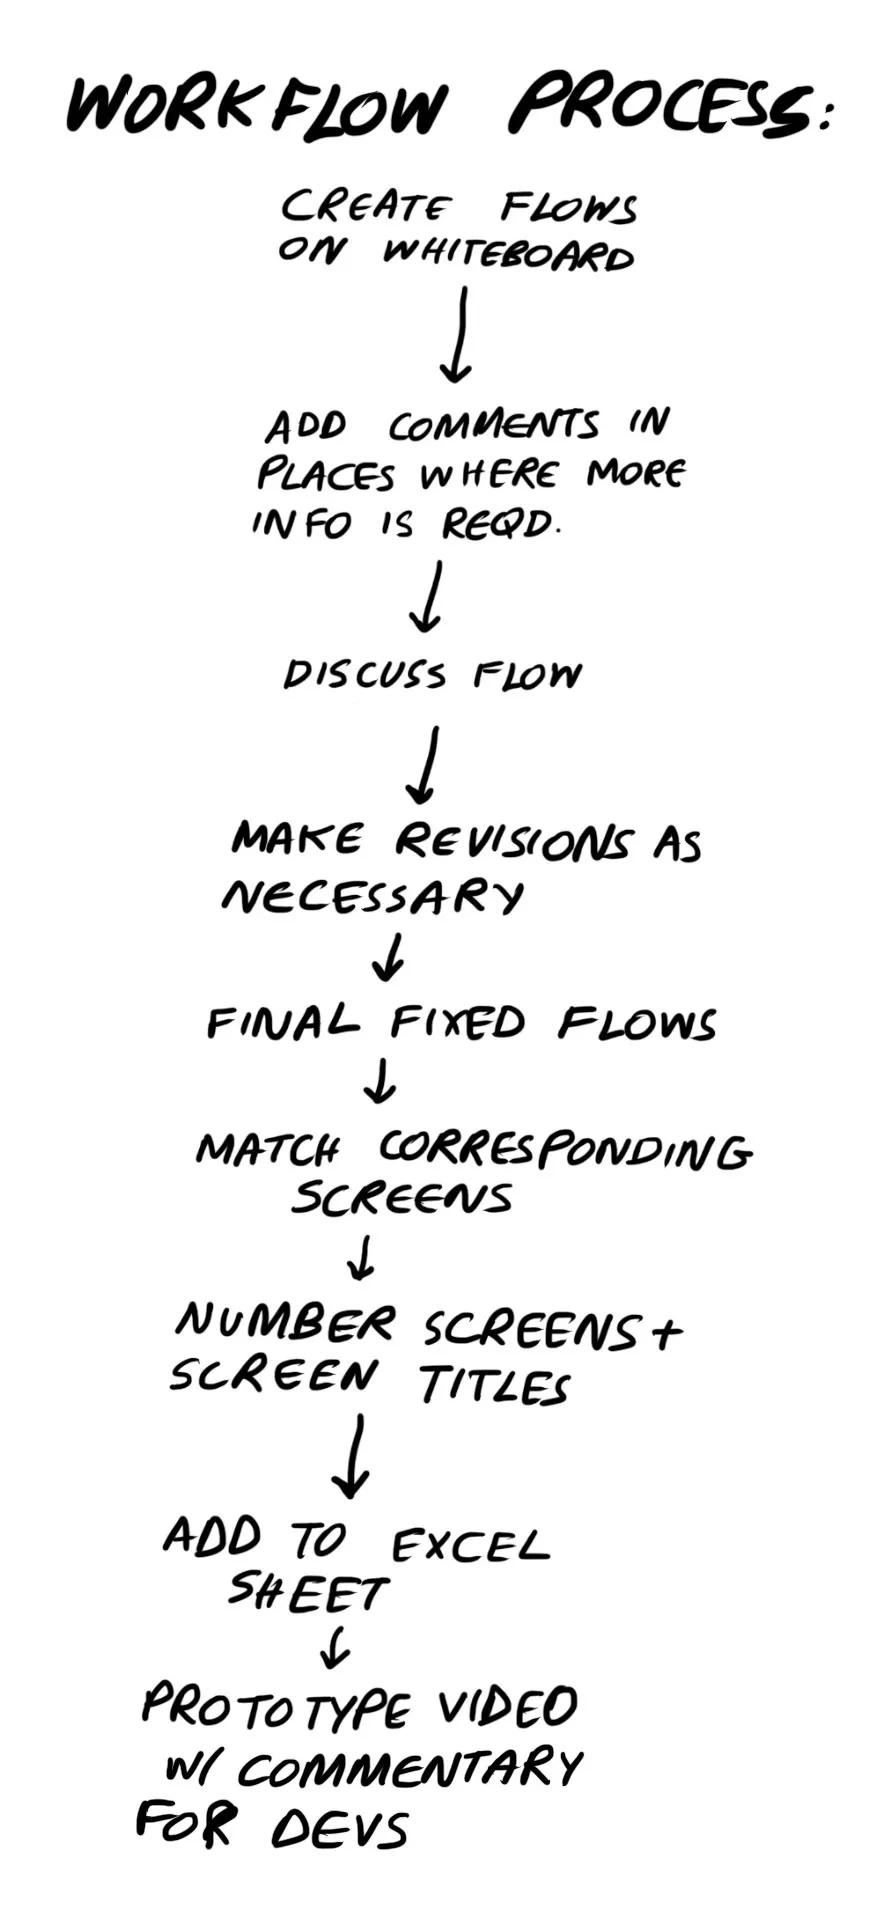
the process
In order to create something of this scale as the sole designer on the project, I needed to have a clearly defined process that helped me stay methodical.
Step 1: Create flows on whiteboard
Step 2: Add comments in places where more information is required
Step 3: Discuss flow with the team
Step 4: Make revisions as necessary
Step 5: Fix finalized flow diagrams
Step 6: Design screens corresponding to flow
Step 7: Assign screen numbers and titles
Step 8: Update Excel sheet to reflect steps 1-7
Step 9: Create a recorded prototype or clickthrough with commentary for developers
01
understanding the product
The process began by taking down requirements and understanding the end-to-end user journey.
02
user flows
After discussing the flows with the team, I then created more concrete flow diagrams for the different users.
03
screens
Once the flow diagrams were in place, I then designed the screens for each of the blocks of the flowchart.
04
clickthrough
After designing the screens, a prototype was created along with a recording to help visualize the entire journey.
05
additional videos
I also recorded additional short clips to highlight supporting user journeys and to also show the expected functionality of certain elements to developers.
what does chirp do?
The platform enables brokers to bridge the gap between aircraft operators and travellers, and helps them service the needs of their clients.
the process
In order to create something of this scale as the sole designer on the project, I needed to have a clearly defined process that helped me stay methodical.
Step 1: Create flows on whiteboard
Step 2: Add comments in places where more information is required
Step 3: Discuss flow with the team
Step 4: Make revisions as necessary
Step 5: Fix finalized flow diagrams
Step 6: Design screens corresponding to flow
Step 7: Create a recorded prototype or clickthrough with commentary for developers
01
understanding the product
The process began by taking down requirements and understanding the end-to-end user journey.
02
user flows
After discussing the flows with the team, I then created more concrete flow diagrams for the different users.
03
screens
Once the flow diagrams were in place, I then designed the screens for each of the blocks of the flowchart.
04
clickthrough
After designing the screens, a prototype was created along with a recording to help visualize the entire journey.
05
additional videos
I also recorded additional short clips to highlight supporting user journeys and to also show the expected functionality of certain elements to developers.